How To Size Pneumatic Pipe/Tubing
Post By: Ryan King On: 06-04-2021 Read Time: 5 minutes - Guides - Pneumatics
Post By: Ryan King On: 06-04-2021 Read Time: 5 minutes - Guides - Pneumatics
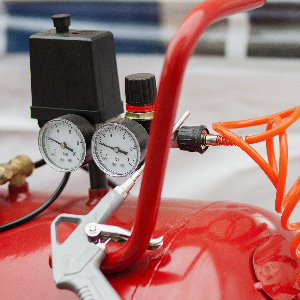
It's not uncommon for a pneumatic system to be running inefficiently because it can't get an adequate airflow. This is usually because the compressed air pipework or tubing is too narrow, and isn't delivering enough pressure. Your compressor might be serving more pneumatic equipment than it was when you installed it, or the equipment itself may have changed to require more air. It could be that the pipework or tubing was the wrong size to start with.
Knowing how to size pneumatic pipe or tubing is a key factor in getting the optimum performance out of your system. If the diameter of the pipe is too small, the compressed air will have trouble passing downstream to the actuator, and you'll see a drop in pressure. The pressure of the air leaving the compressor will be much higher than the compressed air when it reaches the actuator, and this means the actuator won't function at its full capacity.
If the pressure drops too far, you'll have to raise the set point on your compressor. A higher set point will deliver greater pressure, but it will also consume more energy in doing it, and this costs money. To avoid this, aim to keep your pressure drop to 0.1 bar or less. This means that the air pressure measured at the actuator should not be more than 0.1 bar lower than at the compressor outlet. So if the compressed air leaving the compressor outlet measures 7 bar, it should not drop below 6.9 bar at the actuator.
As well as the whole pipe or tube being too narrow in diameter, any obstruction in the course of the compressed air can create a pressure drop. This could simply be a bend in the pipe, the kinks in flexible hoses, or the journey through valves or couplings. All these obstructions can create a pressure drop, and the longer your pipes are, the greater the pressure drop will be.
You also need to factor in the amount of air that's actually passing through the pipe. The greater the quantity of air that needs to travel at one time through a pipe, the greater will be the pressure drop. You'll notice that there's no pressure drop when no air at all is being used – i.e. when the pneumatic system isn't running. To get an accurate measurement of pressure drop, therefore, you must always measure it when the system is running at full capacity.
So, in order to calculate pressure drop accurately you need to know the following:
Pipe/tube diameter Pipe/tube length Any points of obstruction AirflowTo factor in this measurement, you need to know the rate of airflow through your pneumatic system. This is usually supplied by the manufacturer in the specs of your compressor. As part of the airflow spec, you'll see a line stating the maximum compressor output, which is the maximum quantity of air the compressor can supply at the rated pressure. This will be stated in litres per second (l/s), cubic feet per minute (CFM), or sometimes m³ per minute or hour.
In most cases, it will actually say Nl/s (normal litres per second) or SCFM (standard cubic feet per minute. This indicates that the stated values apply to standard or reference operating conditions. These are set at 1 bar, with 0% relative humidity at 20º Celsius.
If you want to know how to size pneumatic pipe or tubing, you can use our table below. While there is a more complicated way of doing the pressure drop calculation with mathematical formulas, this table will take all the hassle out of it. The measurements in the table provide for 7 bars of pressure with a maximum drop of 0.3 bar.
| N m3/h | S cfpm | 50m | 100m | 150m | 300m | 500m | 750m | 1000m | 2000m |
| 164ft | 328ft | 492ft | 984ft | 1640ft | 2460ft | 3280ft | 6561ft | ||
| 10 | 6 | 15 | 15 | 15 | 20 | 20 | 25 | 25 | 25 |
| 30 | 18 | 15 | 15 | 15 | 25 | 25 | 25 | 25 | 40 |
| 50 | 29 | 15 | 25 | 25 | 25 | 40 | 40 | 40 | 40 |
| 70 | 41 | 25 | 25 | 25 | 40 | 40 | 40 | 40 | 40 |
| 100 | 59 | 25 | 25 | 40 | 40 | 40 | 40 | 40 | 63 |
| 150 | 88 | 25 | 40 | 40 | 40 | 40 | 40 | 40 | 63 |
| 250 | 147 | 40 | 40 | 40 | 40 | 63 | 63 | 63 | 63 |
| 350 | 206 | 40 | 40 | 40 | 63 | 63 | 63 | 63 | 80 |
| 500 | 294 | 40 | 40 | 63 | 63 | 63 | 63 | 63 | 80 |
| 750 | 441 | 40 | 63 | 63 | 63 | 63 | 80 | 80 | 100 |
| 1000 | 589 | 63 | 63 | 63 | 63 | 63 | 80 | 80 | 100 |
| 1250 | 736 | 63 | 63 | 63 | 63 | 63 | 100 | 100 | 100 |
| 1500 | 883 | 63 | 63 | 63 | 80 | 80 | 100 | 100 | 125 |
| 1750 | 1030 | 63 | 63 | 80 | 80 | 80 | 100 | 100 | 125 |
| 2000 | 1177 | 63 | 80 | 80 | 80 | 100 | 100 | 100 | 125 |
| 2500 | 1471 | 63 | 80 | 80 | 80 | 100 | 125 | 125 | 125 |
| 3000 | 1766 | 80 | 80 | 76 | 100 | 100 | 125 | 125 | 150 |
| 3500 | 2060 | 80 | 80 | 100 | 100 | 125 | 125 | 125 | 150 |
| 4000 | 2354 | 80 | 100 | 100 | 100 | 125 | 125 | 125 | 150 |
| 4500 | 2649 | 80 | 100 | 100 | 125 | 125 | 125 | 150 | 150 |
| 5000 | 2943 | 80 | 100 | 100 | 125 | 125 | 150 | 150 | 150 |
First, find the maximum flow rate of your compressor in the left-hand column. Then look for the total length of your pipe/tubing which you've measured, and find it in the top row. The table will then provide you with the correct pipe size, given in mm of diameter. This value is for a simple, straight pipe with no obstructions.
Any kind of obstruction in your pipe/tubing will increase the pressure drop. This applies to bends, kinks, couplings and any other type of restriction. The drop in pressure also increases exponentially with the number of bends, kinks or couplings that are obstructing the passage of your compressed air. You can account for these obstructions by factoring in an equivalent pipe length, which is a virtual measurement representing each coupling or bend.
You can therefore adjust the pressure drop calculation that you made above in Table 1 to factor in every bend, valve or coupling in your pneumatic system. The values given in Table 2 depend on the diameter of your pipe/tubing, as larger diameter pipes will obviously have a different airflow than smaller ones.
| 25 mm | 40 mm | 50 mm | 80 mm | 100 mm | 125 mm | 150 mm | |
| Bend 90 degrees R = d | 0.3 | 0.5 | 0.6 | 1.0 | 1.5 | 2.0 | 2.5 |
| Bend 90 degrees R = 2d | 0.15 | 0.25 | 0.3 | 0.5 | 0.8 | 1.0 | 1.5 |
| Knee-bend (90 degrees) | 1.5 | 2.5 | 3.5 | 5 | 7 | 10 | 15 |
| T-piece | 2 | 3 | 4 | 7 | 10 | 15 | 20 |
| Check valve | 8 | 10 | 15 | 25 | 30 | 50 | 60 |
| Diaphragm valve | 1.2 | 2.0 | 3.0 | 4.5 | 6 | 8 | 10 |
| Gate valve | 0.3 | 0.5 | 0.7 | 1.0 | 1.5 | 2.0 | 2.5 |
Match the obstruction in your tubing to the pipe diameter in Table 2 to find its equivalent pipe length. For example, a check valve in a 50mm pipe represents 15 meters of equivalent pipe length, so it will create the same drop in pressure as you'd get in 15 metres of straight pipe.
One obstruction won’t significantly affect the pressure drop in your pneumatic system. However, the more complex your system, the more obstacles you'll have in it that will affect the amount of pressure you can lose. If you're wondering how to size your pneumatic pipe/tubing correctly, you'll have to take your system configuration into account, using the tables above to calculate the potential pressure drop.
If you're installing a new system and don't know exactly how many bends and connections will be included, a basic rule of thumb for calculating the pressure drop is to multiply the estimated length of your pipes and tubing by 1.7.